You can try Parallels Desktop for free before purchasing by clicking this link and downloading our trial version
Control Multiple Hosts from a Single Interface
Introduction
Controlling a single host remotely has many benefits, such as using it as a build machine, test machine, or a production machine. However, managing multiple hosts can be complex and challenging. You need to keep track of each host’s resources, health status, and the virtual machines running on them. To simplify this process, you can make use of the Orchestrator service.
The Orchestrator service is an essential part of the DevOps service and starts automatically with the API. It eliminates the complexity of running different binaries and services on the same host. You can use it to add a host to the pool of hosts, which enables you to perform the same operations you would do with a single host, but with the added benefit of automating the selection of the host with enough resources to run the virtual machine and needed architecture.
In this guide, we will show you how to use the Orchestrator service to control multiple hosts from a single interface. We will use a CI/CD pipeline running a simple test on a virtual machine as an example. The pipeline will be triggered by a push to a GitHub repository and will run on a host chosen by the Orchestrator service.
Architecture
This will show you a small diagram of what we will be setting up and how it will work.
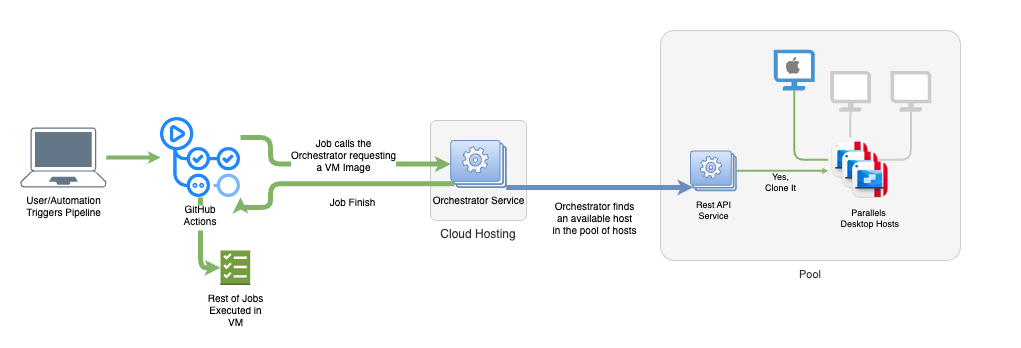
On the example we will show we will only use one host as this is the simplest way to show how the orchestrator service works, but you can add multiple hosts to the orchestrator service and it will automatically select the host with the most resources available to run the virtual machine.
Let’s get started!
Requirements
- Parallels Desktop for Mac
- Parallels Desktop DevOps Service
- GitHub account and repository
- At least one hosts with Parallels Desktop and Parallels Desktop DevOps Service installed
- Visual Studio Code with the Parallels Desktop Extension or
- Rest Client, like Postman or
While you can follow this guide with only one host, it is best to have multiple hosts to see the full potential
Step 1: Install Parallels Desktop DevOps
Install Parallels Desktop DevOps
Devops Service is a command line tool that allows you to manage and orchestrate multiple Parallels Desktop hosts and virtual machines. It will allow you to create, start, stop and delete virtual machines and will also allow you to manage the hosts that are running the virtual machines.
You can download the latest version of the Parallels Desktop DevOps Service by selecting the platform you are using and clicking the download button for the binary.
Parallels Desktop DevOps Service for Mac with Apple Silicon
Parallels Desktop DevOps Service for Mac with Intel chip
You can download the release from the links above, after downloading the binary, copy it to a directory in your path, such as /usr/local/bin, and make it executable.
Or just run the script we created to make it easier to install the service on your mac, you can run the following command in your terminal to install the service.
/bin/bash -c "$(curl -fsSL https://raw.githubusercontent.com/Parallels/prl-devops-service/main/scripts/install.sh)"
Quick Configuration
By default the devops service will run with default values but these can be configured by creating a config.yaml file in the same directory as the binary. Below is an example of a configuration file.
to create a configuration file you can run the following command
touch /usr/local/bin/config.yaml
open -a TextEdit /usr/local/bin/config.yaml
You can then add the following basic configuration to the file, you can find more information about the configuration file in here.
environment:
  api_port: 80
  log_level: DEBUG
  ROOT_PASSWORD: VeryStr0ngPassw0rd
Start it as a service
We can also install it as a daemon to run in the background.
sudo prldevops install service /usr/bin/prldevops
launchctl start com.parallels.devops-service
This command will start the service, and the REST API can then be accessed at http://localhost:80.
To change the configuration you will need to stop the daemon before doing any changes.
Checking if the service is running
Once you started it you can then quickly check the health status of the service by either running the following command.
curl http://localhost:80/api/health/probe
or to go to the browser and navigate to the swagger page.
We also make available a Postman collection that you can import and use to interact with the DevOps Service. You can download it here.
Running the service as a container
You can find more about how to run the service as a container in the Docker documentation win the Getting Started section.
Security
The service will run with default values, these are just fine for demos and to quickly get the service running but for production use, you will need to secure the service. You can find more information about how to secure the service in the official documentation
Accessing the Orchestrator Service
Once the docker container is working you can access the orchestrator using any rest client, like Postman to access the API. Or you can install our Visual Studio Code extension to access the API directly from the editor.
Step 2: Installing the DevOps Service on the Hosts
For each host we want to add to the orchestrator service, we need to install the DevOps service. The DevOps service is responsible for creating and managing virtual machines on the host. You can find the installation instructions on the Installation Guide.
Configuration
While the service will run with default values and you will have access to the orchestrator, this will not be fully setup, you will need to change the service mode to orchestrator in your configuration file.
environment:
  mode: orchestrator
you can leave everything else as default, but you can also change the api_port to a different port if you want to run the orchestrator service on a different port.
Step 3: Adding Hosts to the Orchestrator Service
Now that we have the orchestrator service running and the DevOps service installed on the hosts, we can add the hosts to the orchestrator service.
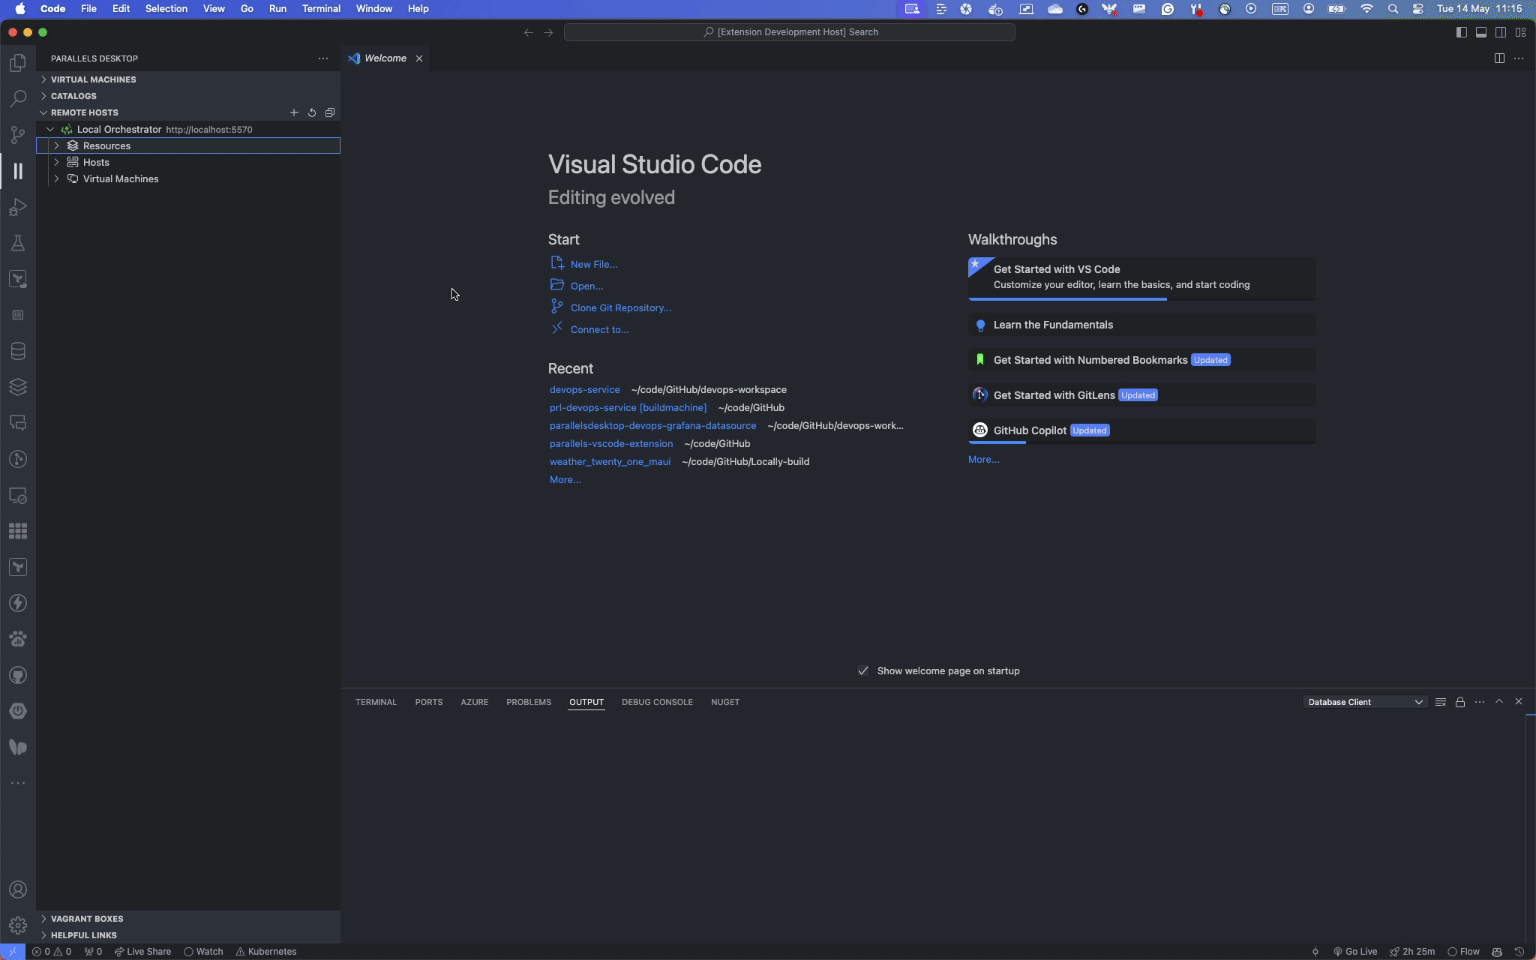
Using Visual Studio Code Extension
We have a Visual Studio Code extension that allows you to interact with the orchestrator service directly from the editor. You can find the extension in the Visual Studio Code Marketplace, making it to manage the orchestrator service.
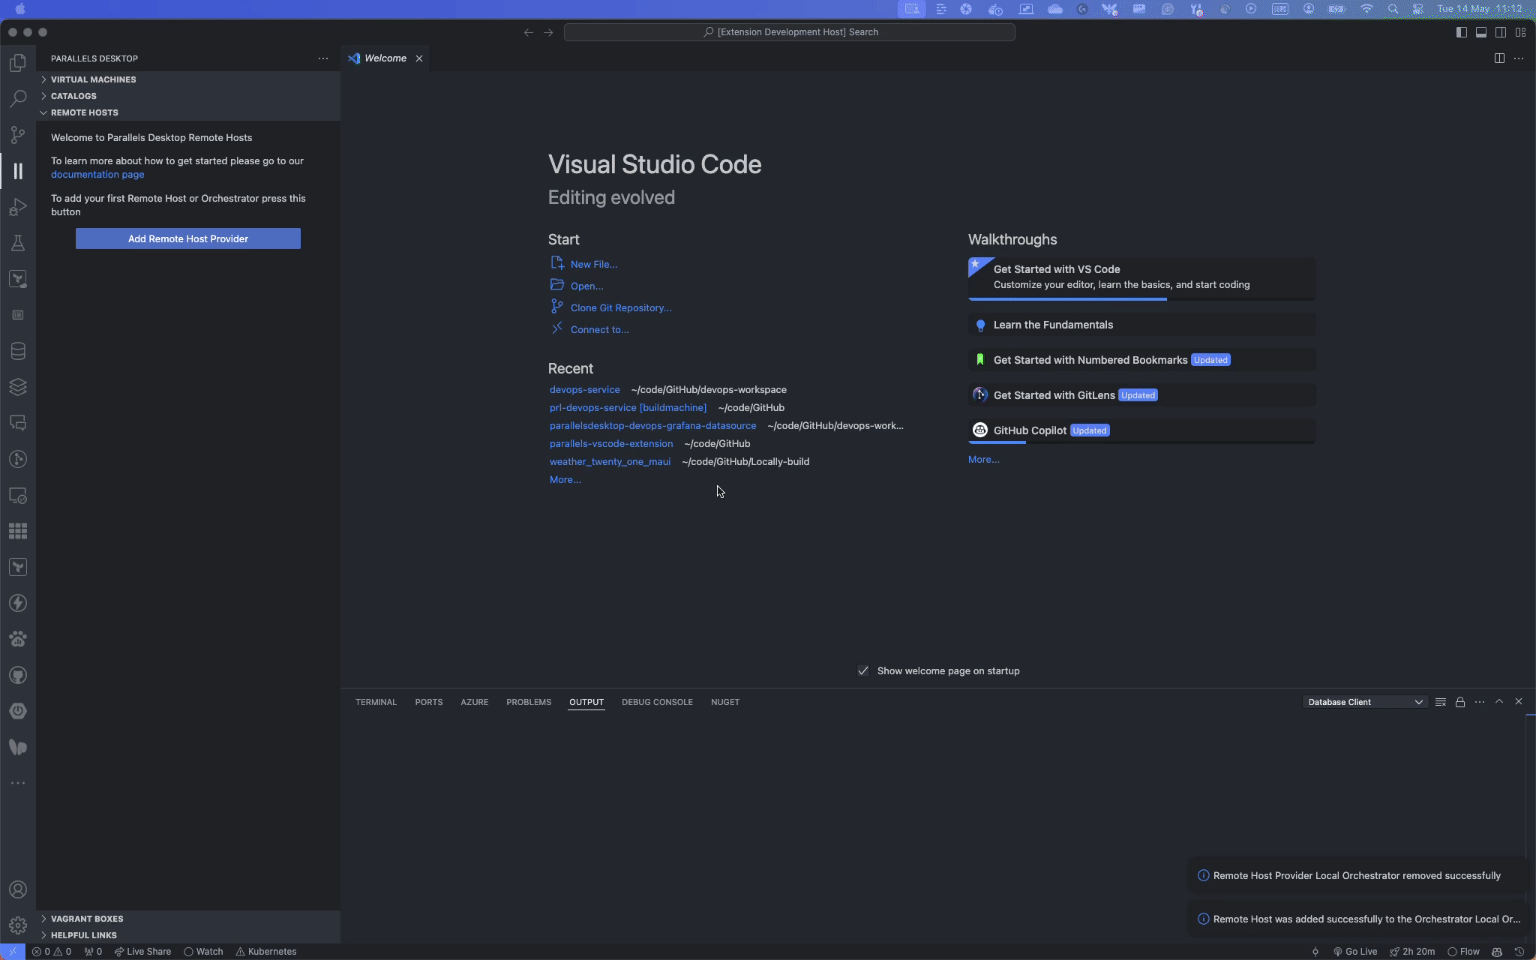
Adding Orchestrators
To add a remote or local orchestrator to the extension, you can click on the Add Remote Orchestrator button and fill in the information for the orchestrator. This will allow you to interact with the orchestrator service directly from the editor.
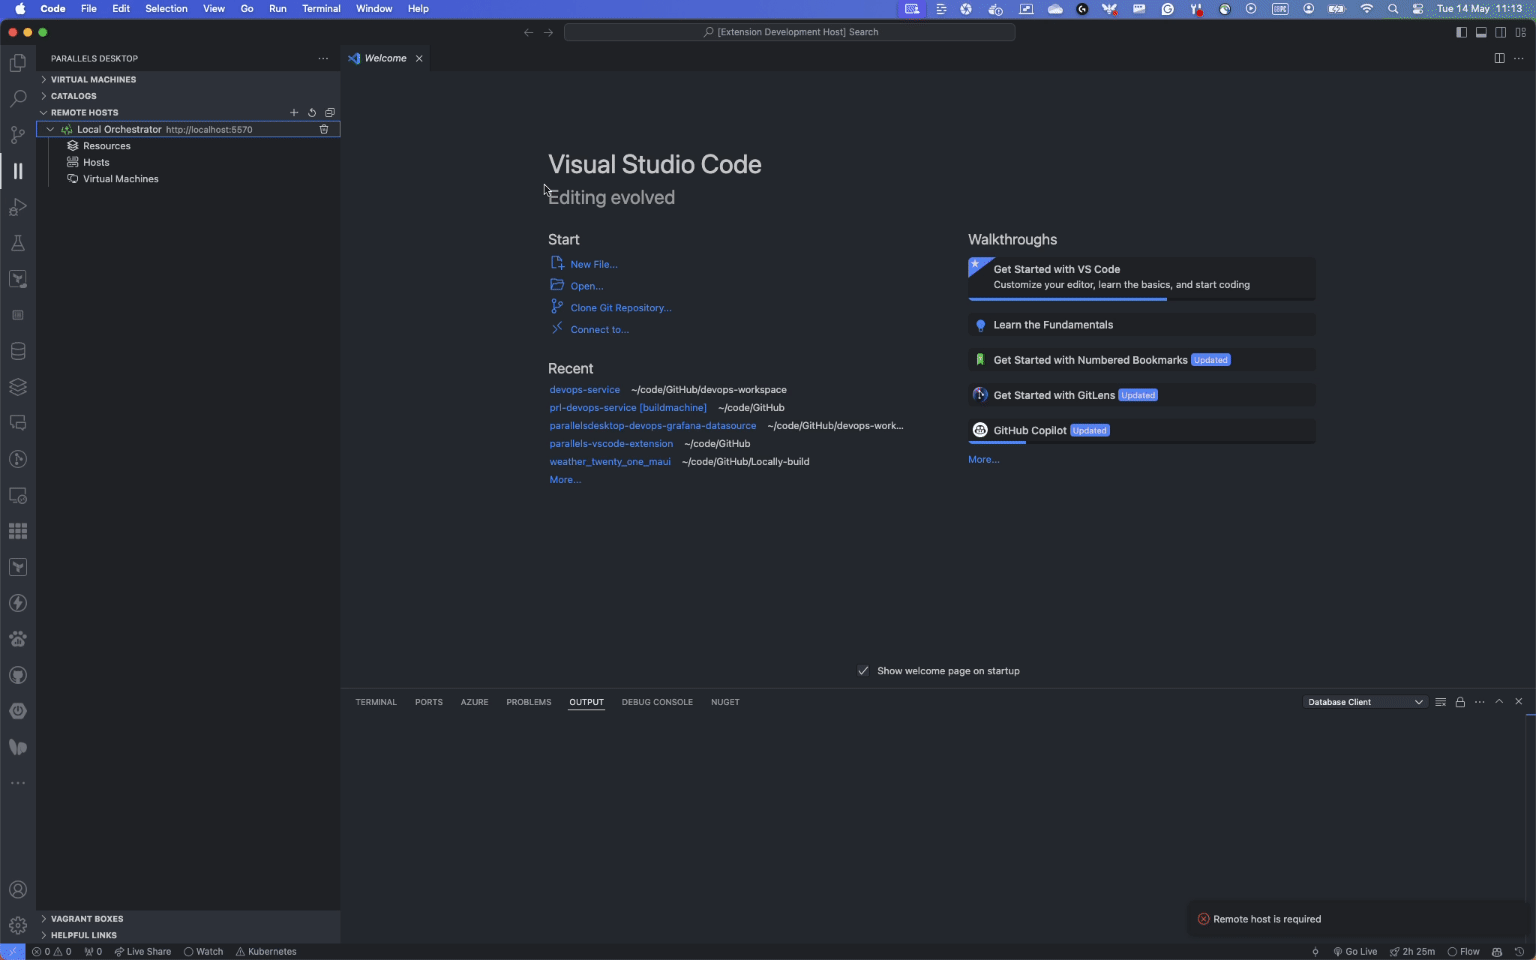
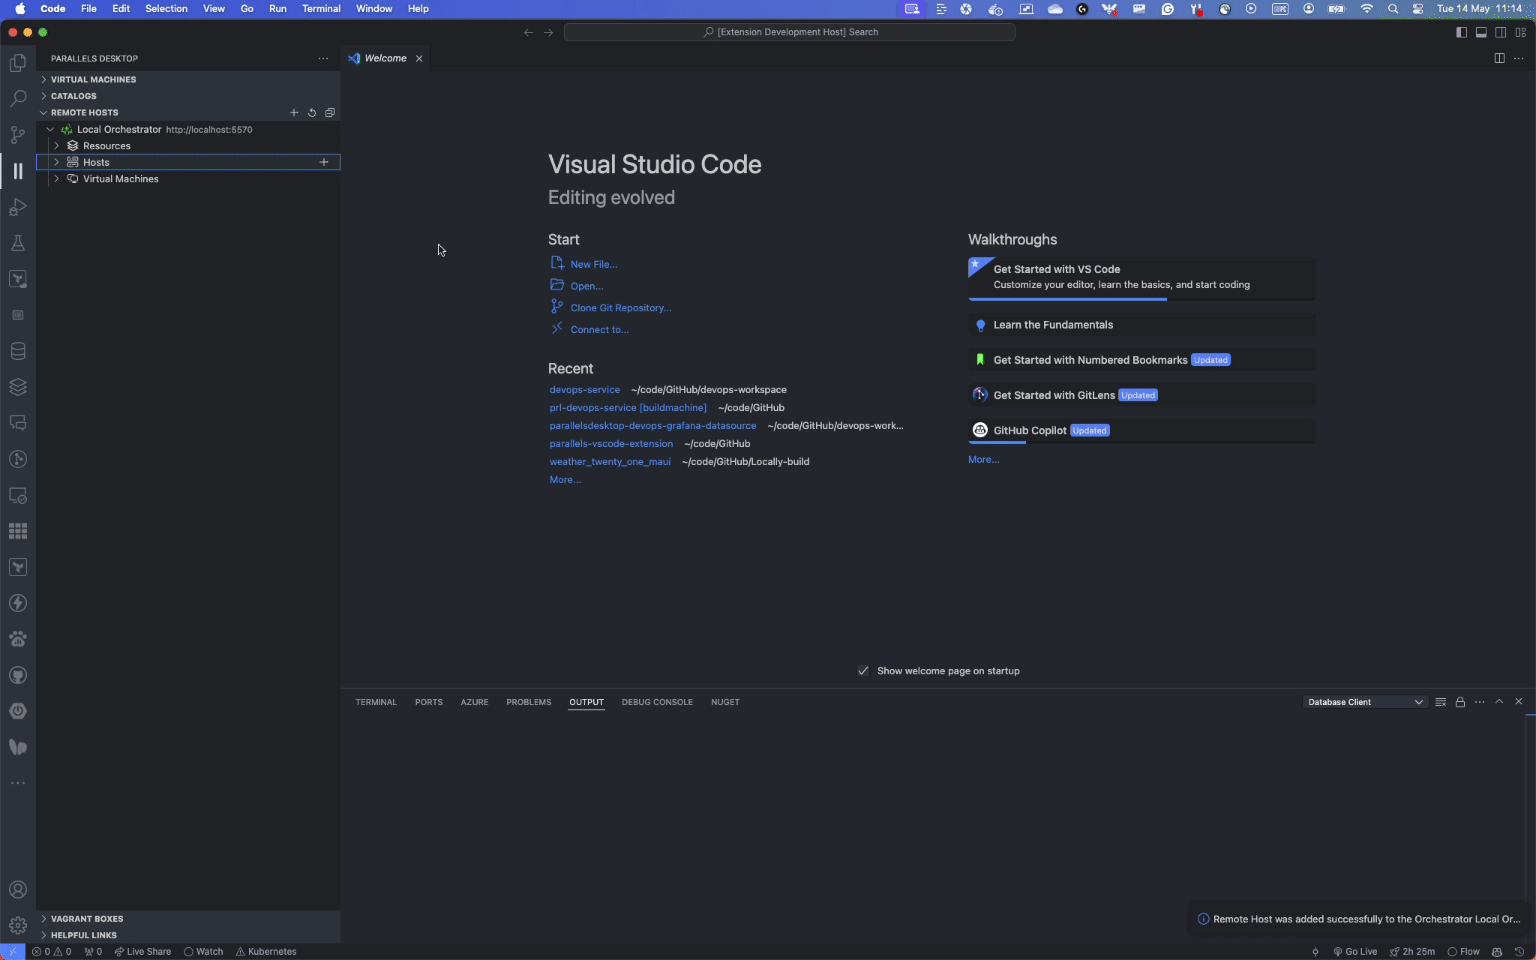
Adding and Listing Hosts
To Add or List hosts in the orchestrator service, you can expand the orchestrator and click in the plus button to add a host.
List Orchestrator Resources
To view the resources available in the orchestrator service, you can click on the Resources tree item and expand it, this will show you how many resources are available.
List Virtual Machine
To view the list of virtual machines running on the orchestrator service, you can click on the Virtual Machines tree item and expand it, this will show you the list of virtual machines running on the orchestrator service.
Using RestApi Postman
Add Hosts
To add a host to the orchestrator service, we need to make a POST request to the /api/v1/orchestrator/hosts endpoint. The request body should contain following information:
{
    "host": "host1.example.com",
    "description": "Example Host 1",
    "tags": [
        "Builder"
    ],
    "authentication": {
        "username": "root@localhost",
        "password": "VeryStr0ngPassw0rdg"
    }
}
Where:
hostis the hostname of the hostdescriptionis a description of the hosttagsare the tags associated with the host, this can be omitted if not needed itauthenticationis the authentication information for the hostusernameis the username to access the hostpasswordis the password to access the host
You can repeat this process for each host you want to add to the orchestrator service. The orchestrator service will automatically detect the resources available on each host.
Listing Hosts
To list the hosts added to the orchestrator service, you can make a GET request to the /api/v1/orchestrator/hosts endpoint. and this should return a list of hosts with their resources.
Resources List
You can also request how much resources are available in the orchestrator service by making a GET request to the /api/v1/orchestrator/overview/resources endpoint. This will return a list of resources available in the orchestrator service.
List Virtual Machine
To list the virtual machines running on the orchestrator service, you can make a GET request to the /api/v1/orchestrator/vms endpoint. This will return a list of virtual machines running on the orchestrator service.
Step 4: Creating a CI/CD Pipeline
Now that we have our hosts added to the orchestrator service, we can create a CI/CD pipeline that will run a simple test on a virtual machine. We will use GitHub Actions to create the pipeline and run it. This will just be a simple example to show how the orchestrator service can be used, it will leave the created VM without cleaning it so you can have a look at it.
If you want to know more about how our GitHub Action works in a CI/CD pipeline environment or to better understand how does the pipeline file works you can check this example.
We will also need to use the Catalog Service to create a VM that we will use in the pipeline for downloading the vms, you can check how to do this in this example.
name: Test Pipeline

on:
  workflow_dispatch:

jobs:
  create_runner:
    # This will be the name of the job
    name: Deploy Self Hosted Runner
    # This job will be running on the ubuntu-latest runner, we could use a self-hosted runner
    # as on the GitHub Actions example but for simplicity we will use the GitHub hosted runner
    runs-on: ubuntu-latest
    # This will be the steps that will be executed on this job
    steps:
        # We need to pull the VM that we will be using for the pipeline from the catalog
        - name: Pull Vm
          id: clone
          uses: parallels/parallels-desktop-github-action@v1
          with:
            operation: 'pull'
            # The username to access the devops service
            username: ${{ secrets.PARALLELS_USERNAME }}
            # The password to access the devops service
            password: ${{ secrets.PARALLELS_PASSWORD }}
            # Set this to true if you are using a self signed certificate
            insecure: true
            # the orchestrator for the devops service
            orchestrator_url: example.com:8080
            # The image we will be pulling from the catalog
            base_image: http://root:$@catalog.example.com/BASE_BUILDER/v1
            # If we should start the VM after cloning
            start_after_op: true
        # This step we will be setting up the runner on the VM that we cloned
        - name: Configure Github Runner
          id: configure
          uses: parallels/parallels-desktop-github-action@v1
          with:
            # How many retries we should do if the operation fails on each execution
            max_attempts: 5
            # What will be the timeout after each failed attempt and before the next one
            timeout_seconds: 2
            operation: 'run'
            username: ${{ secrets.PARALLELS_USERNAME }}
            password: ${{ secrets.PARALLELS_PASSWORD }}
            orchestrator_url: example.com:8080
            insecure: true
            machine_name: ${{ steps.pull.outputs.vm_id }}
            # These will be running some scripts we have created to install the runner in an automated way
            # you can copy this step and change only the secrets to use the scripts that we have created
            run: |
                curl -o /Users/install-runner.sh https://raw.githubusercontent.com/Parallels/prlctl-scripts/main/github/actions-runner/mac/install-runner.sh
                curl -o /Users/configure-runner.sh https://raw.githubusercontent.com/Parallels/prlctl-scripts/main/github/actions-runner/mac/configure-runner.sh
                curl -o /Users/remove-runner.sh https://raw.githubusercontent.com/Parallels/prlctl-scripts/main/github/actions-runner/mac/remove-runner.sh
                chmod +x /Users/install-runner.sh
                chmod +x /Users/configure-runner.sh
                chmod +x /Users/remove-runner.sh

                /Users/install-runner.sh -u parallels -p /Users
                /Users/configure-runner.sh -u parallels -p /Users/action-runner -o Locally-build -t ${{ secrets.GH_PAT }} -n ${{ github.run_id }}_builder -l ${{ github.run_id }}_builder
   # The GitHub action will output the ID and the name of the VM that we cloned, this will be used later on
   # for the cleanup job
   outputs:
        vm_id: ${{ steps.pull.outputs.vm_id }}
        vm_name: ${{ steps.pull.outputs.vm_name }}
Conclusion
In this guide, we showed you how to use the Orchestrator service to control multiple hosts from a single interface. We installed the DevOps service on the hosts, added them to the Orchestrator service, and created a CI/CD pipeline that runs a simple test on a virtual machine. We used GitHub Actions to create the pipeline and run it on a host chosen by the Orchestrator service.